|
|
程序还在加紧完善
晚上再打包传上来
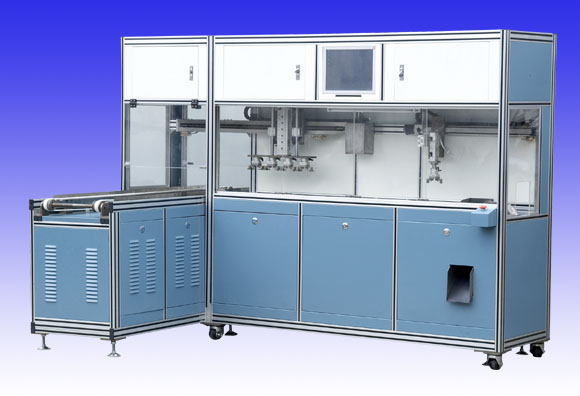
小弟最近在东莞做项目,比较空闲,
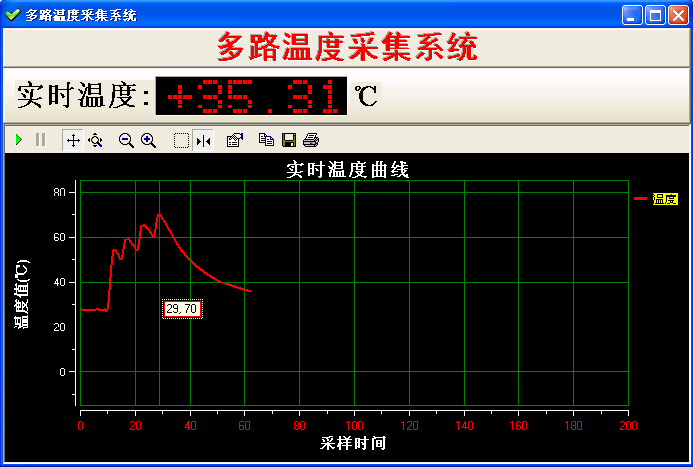
昨晚做了一个温度采集程序,在大家面前献丑了,
希望能与大家交流,想结交各界玩单片机的朋友,
需要完整源程序项目文件和上位机程序(delphi7)的朋友请留下邮箱。
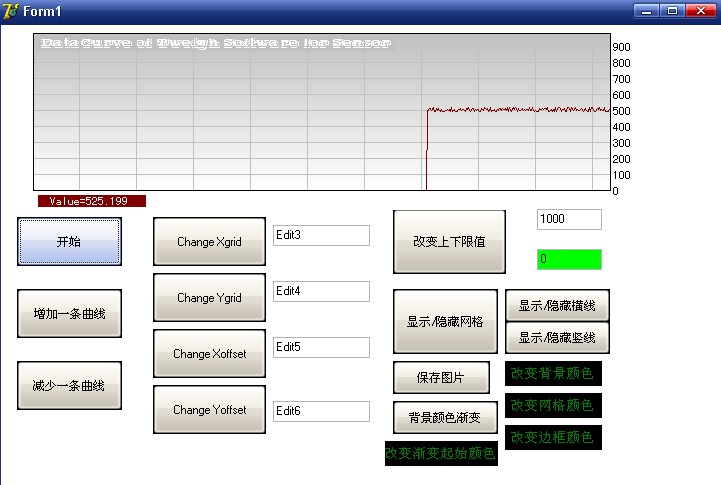
下位机用IAR开发环境,上位机用DELPHI7开发
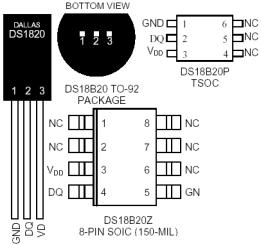
DS18B20的外观和脚位 (原文件名:DS18B20.jpg)
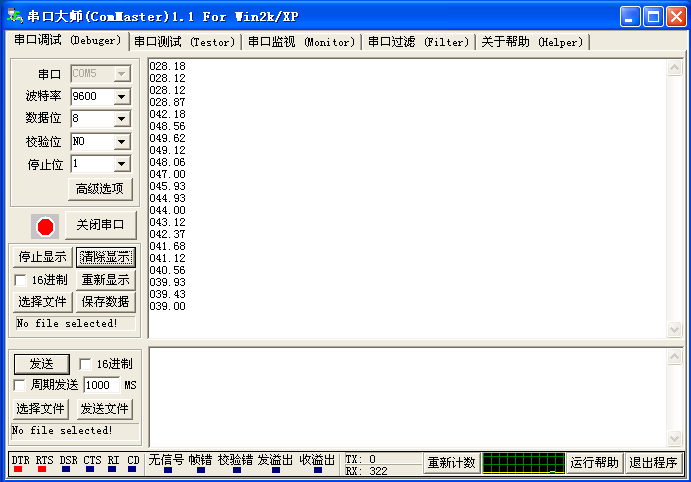
用串口调试软件接受数据 (原文件名:111.PNG)
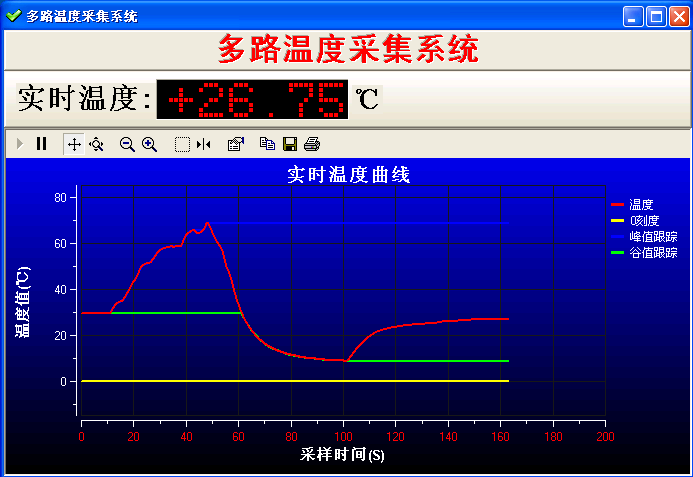
(原文件名:烟头+冰块的温度曲线.PNG)
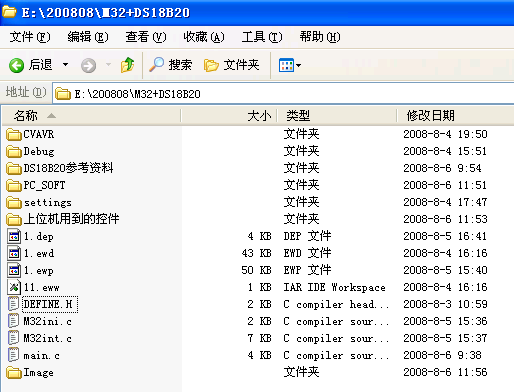
(原文件名:全部文件.PNG)
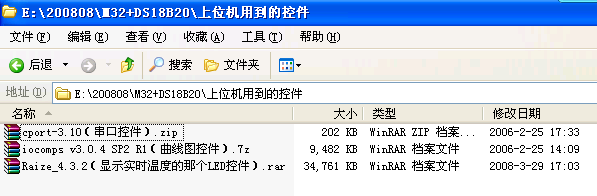
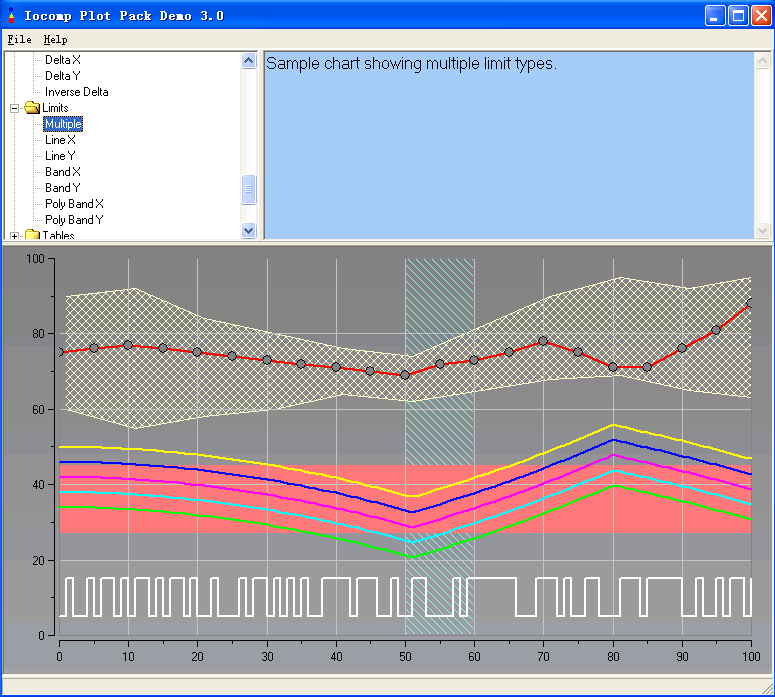
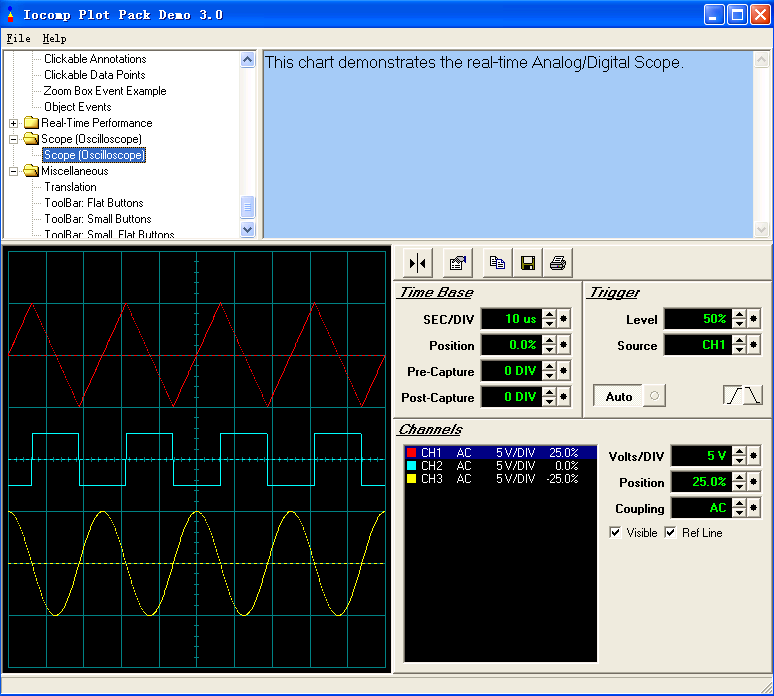
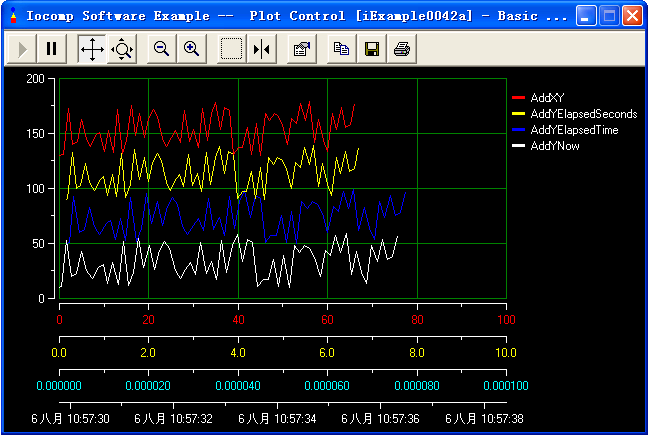
(原文件名:上位机软件用到的控件.PNG)
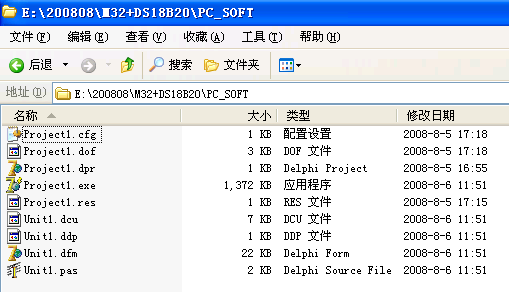
(原文件名:上位机软件源程序.PNG)
这是我收藏的DELPHI资料-其中一部分电子书,如果有人需要的话就回一下帖子,我再一个个传上来
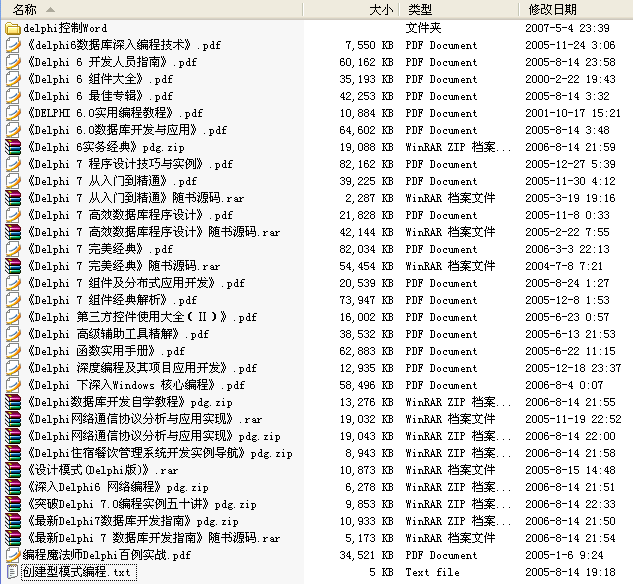
(原文件名:我收藏的DELPHI资料-其中一部分电子书.PNG)
上位机部分源程序:
unit Unit1;
interface
uses
Windows, Messages, SysUtils, Variants, Classes, Graphics, Controls, Forms,
Dialogs, CPort, ExtCtrls, RzBorder, StrUtils, StdCtrls, RzLabel,
iComponent, iVCLComponent, iCustomComponent, iPlotComponent, iPlot,
RzButton, iPlotChannel, RzPanel, Mask, RzEdit;
type
TForm1 = class(TForm)
iPlot1: TiPlot;
RzPanel1: TRzPanel;
RzLEDDisplay1: TRzLEDDisplay;
RzLabel1: TRzLabel;
RzLabel2: TRzLabel;
RzPanel2: TRzPanel;
RzLabel3: TRzLabel;
ComPort1: TComPort;
procedure ComPort1RxFlag(Sender: TObject);
procedure iplot_init();
procedure FormCreate(Sender: TObject);
procedure COMM_init();
procedure FormClose(Sender: TObject; var Action: TCloseAction);
private
{ Private declarations }
public
{ Public declarations }
end;
var
Form1: TForm1;
px:word;
implementation
{$R *.dfm}
//****************************************************************************
//---窗体创建过程---
//****************************************************************************
procedure TForm1.FormCreate(Sender: TObject);
begin
COMM_init(); // 串口控件的初始化
iplot_init(); // 曲线图的初始化
end;
//****************************************************************************
//---串口接收到标志字节产生中断---
//****************************************************************************
procedure TForm1.ComPort1RxFlag(Sender: TObject);
var
str:string;
begin
// 以字符串的形式从串口读取数据
ComPort1.ReadStr(str,33);
// 去掉数据帧的头和尾直接显示
RzLEDDisplay1.Caption:='+'+MidStr(str,2,5);
// 在曲线图上绘一个点
iPlot1.Channel[0].AddXY(px,StrToFloat(RzLEDDisplay1.Caption));
iPlot1.Channel[1].AddXY(px,0); // 跟随绘制0刻度线
iPlot1.Channel[2].AddXY(px,iPlot1.Channel[0].GetYMax);
iPlot1.Channel[3].AddXY(px,iPlot1.Channel[0].GetYMin);
px:=px+1;
end;
//****************************************************************************
//---初始化曲线图---
//****************************************************************************
procedure TForm1.iplot_init();
begin
iPlot1.RemoveAllChannels; // 移除所有通道
iPlot1.RemoveAllXAxes; // 移除所有X轴
iPlot1.TitleText:='实时温度曲线'; // 设置曲线图的标题
//iPlot1.TitleVisible := False; // 不显示曲线图标题
iPlot1.YAxis[0].Span := 100; // 设置Y轴的显示范围
iPlot1.YAxis[0].Min:=-15; // 设置Y轴的起始值
iPlot1.YAxis[0].Title:='温度值(℃)'; // Y轴名称
iPlot1.YAxis[0].TitleShow:=True;
//---配置温度曲线---------------------------------------------------
iPlot1.AddChannel; // 添加一个曲线
iPlot1.Channel[0].TitleText := '温度'; // 设置曲线的名称
iPlot1.Channel[0].Color := clRed; // 设置曲线的颜色
// 曲线插值,加上下面这一句显示的曲线不会有棱角
iPlot1.Channel[0].InterpolationStyle := ipistCubicSpline;
iPlot1.Channel[0].TraceLineWidth := 2; // 曲线显示的宽度
iPlot1.AddXAxis; // 添加一个X轴
iPlot1.XAxis[0].Title:='采样时间(S)'; // X轴名称
iPlot1.XAxis[0].TitleShow:=True;
iPlot1.XAxis[0].Span := 200; // X轴显示范围
iPlot1.Channel[0].XAxisName := iPlot1.XAxis[0].Name;
iPlot1.XAxis[0].LabelsFont.Color := clRed; // 标签字体颜色
//---配置0刻度线---------------------------------------------------
iPlot1.AddChannel; // 添加一个曲线
iPlot1.Channel[1].TitleText := '0刻度'; // 设置曲线的名称
iPlot1.Channel[1].Color := clYellow; // 设置曲线的颜色
iPlot1.Channel[1].TraceLineWidth := 2; // 曲线显示的宽度
iPlot1.Channel[1].XAxisName := iPlot1.XAxis[0].Name;
//---配置峰值跟踪显示线---------------------------------------------------
iPlot1.AddChannel; // 添加一个曲线
iPlot1.Channel[2].TitleText := '峰值跟踪'; // 设置曲线的名称
iPlot1.Channel[2].Color := clBlue; // 设置曲线的颜色
iPlot1.Channel[2].TraceLineWidth := 2; // 曲线显示的宽度
iPlot1.Channel[2].XAxisName := iPlot1.XAxis[0].Name;
//---配置谷值跟踪显示线---------------------------------------------------
iPlot1.AddChannel; // 添加一个曲线
iPlot1.Channel[3].TitleText := '谷值跟踪'; // 设置曲线的名称
iPlot1.Channel[3].Color := clLime; // 设置曲线的颜色
iPlot1.Channel[3].TraceLineWidth := 2; // 曲线显示的宽度
iPlot1.Channel[3].XAxisName := iPlot1.XAxis[0].Name;
end;
//****************************************************************************
//---初始化串口控件,有了这个子过程,就不需要在框框里该属性了,方便阅读---
//****************************************************************************
procedure TForm1.COMM_init();
begin
ComPort1.Port:='COM5'; // 串口号,我的是USB转出来的
Comport1.BaudRate:=br9600; // 波特率
ComPort1.EventChar:=Char(10); // 设置事件字符
//我的单片机是用串口供电的,所有要以下两句
ComPort1.FlowControl.ControlDTR:=dtrEnable; // 打开DTR
ComPort1.FlowControl.ControlRTS:=rtsEnable; // 打开RTS
ComPort1.Open; // 打开串口
end;
//****************************************************************************
//---窗体关闭过程---
//****************************************************************************
procedure TForm1.FormClose(Sender: TObject; var Action: TCloseAction);
begin
ComPort1.Close; // 关闭串口
end;
end.
下位机部分程序:
#include <iom32.h>
#include "DEFINE.H"
#define CLR_DIR_1WIRE DDRD_DDD3=0 // 设置总线为输出口
#define SET_DIR_1WIRE DDRD_DDD3=1 // 设置总线为输入口
#define CLR_OP_1WIRE PORTD_PORTD3=0 // 总线清0
#define SET_OP_1WIRE PORTD_PORTD3=1 // 总线置1
#define CHECK_IP_1WIRE (PIND_PIND3) // 检测总线状态
extern void init_devices(void);
void init_18b20();
void write_18b20(u8 x);
u8 read_18b20();
void gettemp();
u16 ms_count;
u8 wmh,wml;
u32 WenDu;
void main( void )
{
init_devices();
while(1)
{
if (ms_count==1000)
{
ms_count=0;
gettemp();
UDR=WenDu/10000+48; // 百位
while (!UCSRA_UDRE){;} // 等待发送器就绪
UDR=(WenDu%10000)/1000+48; // 十位
while (!UCSRA_UDRE){;} // 等待发送器就绪
UDR=WenDu%1000/100+48; // 个位
while (!UCSRA_UDRE){;} // 等待发送器就绪
UDR=46; // 个位
while (!UCSRA_UDRE){;} // 等待发送器就绪
UDR=WenDu%100/10+48; // 个位
while (!UCSRA_UDRE){;} // 等待发送器就绪
UDR=WenDu%10+48; // 个位
while (!UCSRA_UDRE){;} // 等待发送器就绪
UDR=0X0a;
//
}
}
}
//************************************************************************
//===初始化18B20===
//************************************************************************
void init_18b20()
{
SET_DIR_1WIRE; // 设置总线为输出
SET_OP_1WIRE;
CLR_OP_1WIRE;
Delay_us(250);
Delay_us(250); // 等待500us
SET_OP_1WIRE;
CLR_DIR_1WIRE;
Delay_us(20); // 15~60us
while(CHECK_IP_1WIRE);
SET_DIR_1WIRE;
SET_OP_1WIRE;
Delay_us(140); // 60~240us
}
//************************************************************************
//===写入一个字节到18B20===
//************************************************************************
void write_18b20(u8 x)
{
u8 m;
for(m=0;m<8;m++)
{
CLR_OP_1WIRE;
if(x&(1<<m)) // 先写低位数据
SET_OP_1WIRE;
else
{CLR_OP_1WIRE;}
Delay_us(40); // 15~60us
SET_OP_1WIRE;
}
SET_OP_1WIRE;
}
//************************************************************************
//===从18B20读取一个字节===
//************************************************************************
u8 read_18b20()
{
u8 temp,k,n;
temp=0;
for(n=0;n<8;n++)
{
CLR_OP_1WIRE;
SET_OP_1WIRE;
CLR_DIR_1WIRE;
k=(CHECK_IP_1WIRE); // 从低位开始读数据
if(k)
temp|=(1<<n);
else
temp&=~(1<<n);
Delay_us(50); // 60~120us
SET_DIR_1WIRE;
}
return (temp);
}
//************************************************************************
//===读取温度值===
//************************************************************************
void gettemp() //读取温度值
{
u8 tem_h,tem_l;//,wm0,wm1,wm2,wm3;
init_18b20(); // 复位18b20
write_18b20(0xcc); // 跳过ROM命令
write_18b20(0x44); // 启动温度转换
//__delay_cycles(6400000);
Delay_ms(200); // 不延时也好使,不知道怎么回事!
Delay_ms(200); // 不延时也好使,不知道怎么回事!
Delay_ms(200); // 不延时也好使,不知道怎么回事!
Delay_ms(200); // 不延时也好使,不知道怎么回事!
init_18b20();
write_18b20(0xcc); // 发送跳过ROM命令
write_18b20(0xbe); // 发送读数据命令
tem_l=read_18b20(); // 读温度低字节
tem_h=read_18b20(); // 读温度高字节
WenDu=tem_h;
WenDu<<=8;
WenDu+=tem_l;
WenDu=6.25*WenDu;
}
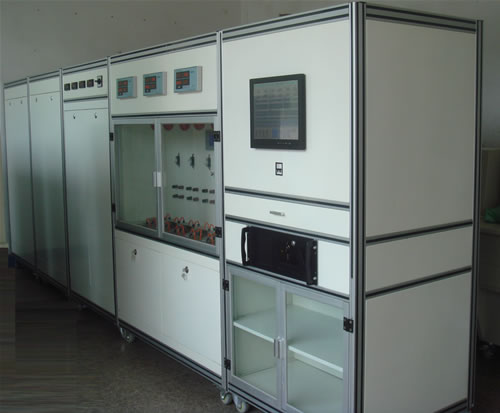
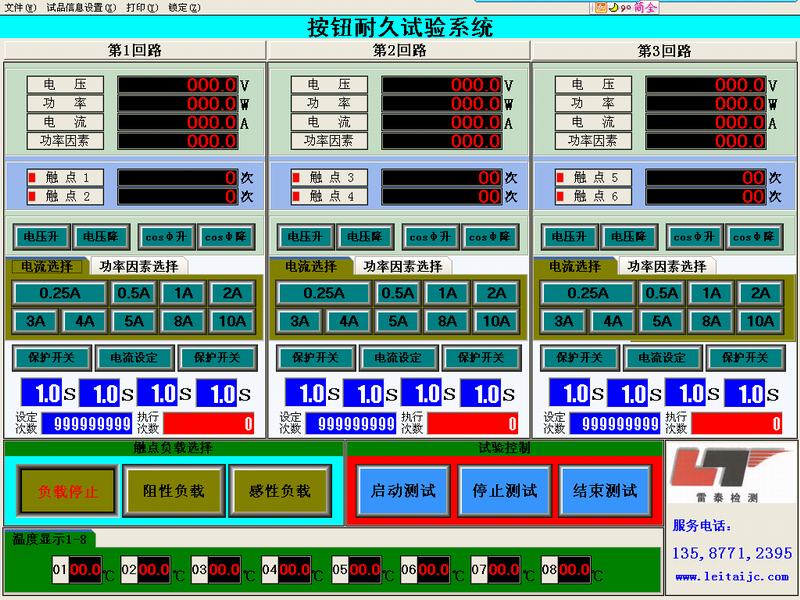
本人擅长做上位机+下位机的系统,有需要的朋友请与我联系。 |
阿莫论坛20周年了!感谢大家的支持与爱护!!
知道什么是神吗?其实神本来也是人,只不过神做了人做不到的事情 所以才成了神。 (头文字D, 杜汶泽)
|
 [复制链接]


 发表于 2008-8-6 09:57:46
 楼主
楼主